Provide a step by step procedure you used to build your instrument:
1. Cut basswood into two seven-inch-long sections.
2. Cut one section of basswood to a width of 1.5 cm. and the other to a width of 2 cm.
3. Sand down all edges of the basswood. These are your bridges.
4. Mark a line down the center of each bridge (lengthwise). On this line, mark points 1/2 inch away from each end. Directly in the center of the bridge (3.5 inches from each end), mark a point.
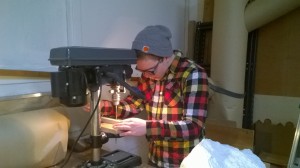
5. Put on safety glasses and turn the operation light of a drill press. Turn on drill press and lower the bit very slowly towards the wood. At each point marked along both bridges, drill a hole. Be sure to be as close to center as possible. The holes should be roughly 3/16″ wide.
6. Sand the outside of each hole drilled in the bridges.
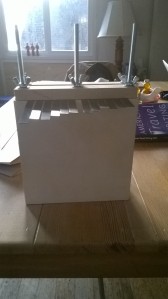
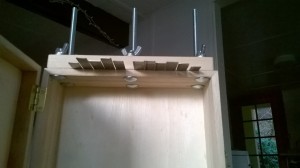
7. Clamp both bridges to the pine box with the holes facing up. The bridges should be exactly parallel to each other and the edge of the box. Place them along the side of the box parallel to the seam along which the box opens. These bridges should not be on the side of the box that holds the clasp or the side that hold the hinges.
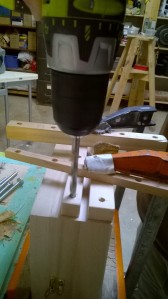
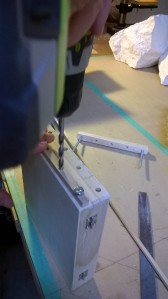
8. Using the holes in the bridges as guides, gently drill through the side of the pine box so that a bolt can fit neatly through holes that run from the bridge through the wood.
9. Sand both the top and the bottom of each hole in the box.
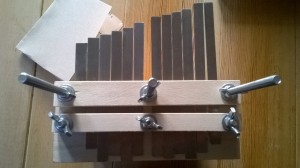
10. Push carriage bolts through the holes in the box and bridge so that the heads of the bolts are inside the box. This should require six bolts: three bolts through the thicker bridge and three through the thinner bridge. The bolts that fit through the thicker bolts should be 4″, and the bolts through the thinner bridge should be 1″. Both sets of bolts should be 3/16″ wide (i.e. radius of 3/32″). Between the bolts should be two equal sections of bridge.
11. Holding the bolts from the outside of the box, pull gently to lock the bolts in place.
12. On the portion of the bolts on the outside of the box, place one washer and one wingnut (that fits with a 3/16″ bolt).
13. Placing the washer at the base of the bolt (outside of the box), spin the wingnut until it touches the washer.
12. To make the keys, mark the putty knives with horizontal lines 1 cm. apart. There should be six 1 cm.-wide sections per putty knife
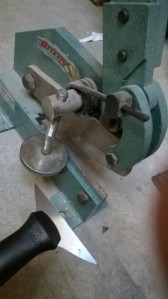
13. Using a metal shear, cut the putty knives along the horizontal lines. The keys will differ in length. There should be twelve keys.
14. Using a metal file, file the edges and points of the keys.
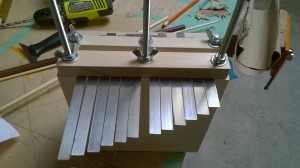
15. Arrange the keys by length.
16. Lift the bridges slightly from the box. Slip the keys under both bridges so that the keys extend over the edge of the box. Leave the shortest possible length of key free on the opposite side of the bridge. The keys should be arranged by length, with six keys in each section of the bridges (delineated by the bolts).
17. To tune the keys, extend the free end to decrease pitch and shorten the free ends to increase pitch. To change the length of the free end of the key, push the key towards the bridge or pull the key away from the bridge.
18. Tune the piano to a range between F1 and E2. The shortest keys should play the highest notes/frequencies. The key lengths necessary to produce each note is listed below (in meters). The following values are the calculated values for length. They need to be modified.
|
Note |
f (Hz) |
L (m) |
|
F2 |
87.31 |
0.061345708 |
|
F2# |
92.5 |
0.05959987 |
|
G2 |
98 |
0.057903277 |
|
G2# |
103.83 |
0.056254174 |
|
A2 |
110 |
0.054653734 |
|
A2# |
116.54 |
0.053098062 |
|
B2 |
123.47 |
0.051586428 |
|
C3 |
130.81 |
0.050118228 |
|
C3# |
138.59 |
0.048691172 |
|
D3 |
146.83 |
0.047305189 |
|
D3# |
155.56 |
0.045958644 |
|
E3 |
164.81 |
0.044650302 |
19. Once the keys are adjusted to produce their correct notes (including adjustments), tighten the wingnuts until the bridges put enough pressure onto the keys to hold them in place.
Materials List:
| Item | Number | Price ($) |
| 1.5 ft. of basswood (1” x 1”) | 1 | Free (In woodshop) |
| 7” x 7” x 3” Pine box w/ clasp | 1 | 2.99 |
| 4” Carriage Bolts (3/16” wide) | 3 | 0.20 (each) |
| 1” Carriage Bolts (3/16” wide) | 3 | 0.15 (each) |
| Wingnuts | 6 | 0.20 (each) |
| Washers | 6 | Free (In woodshop) |
| Spring Steel Putty Knives | 2 | 3.99 (each) |
Adjustments:
- The calculated lengths for the keys relied on a variety of factors which I could not calculate exactly. First, I did not use the speed of sound in spring steel in my equation. Instead, I used the speed of sound in stainless steel, which is a slightly similar alloy. This will alter the calculated lengths of my keys very slightly.
- As the pitch increased, the harmonic of the vibration could have increased. Because the equation for length involves the variable m, which is equal to (2n-1) – n represents the harmonic number, the harmonic of the vibration affects the calculated lengths. It should be noted that the equation (2n-1) represents the pattern of harmonics for vibrations in bars with one free end: the harmonic number will always be odd (i.e. harmonics 1, 3, and 5 are possible, not 2 or 4).
- I cannot devise an equation to account for the adjustments in the lengths of the keys without a deeper understanding of the causes of the inaccuracies. Such other causes could be the width of the key, the pressure holding the key in place as exerted by the bridge, and the force with which the key is struck.
Resources:
http://www.ehow.com/how_5616221_make-thumb-piano.html (Other method)
You’re procedure is very clear and makes sense. You have every step outlined very well, and good job for adding the reminder to wear goggles and be safe. You make your adjustments very clear, understandable, and easy to follow, as well as the tuning process that you went through.
LikeLike
*ADDING ON* There isn’t much that I think needs adding, but maybe a couple of logistic clarifications, like is your materials list the same as it was before?
LikeLike